How AI image generation works
What I explained to 130 architects and designers about GANs, diffusion, ControlNet and the three parameters behind almost every weird result.
In August 2025 I gave a talk to more than 130 architects and designers on how AI image generation works. A year later, almost everything I showed still holds. This is the written version.
Every week a new model comes out and every week someone asks me which one to use. My answer doesn't change: understand the principles and the question answers itself. There are only a few: networks that learn to turn noise into images, three parameters that control how literal the result is, and auxiliary models that protect the geometry. Knowing that is the difference between asking an AI for “a nice render” and getting frustrated, and knowing exactly what to ask, with which tool, and why it failed when it fails.
I'm writing this from practice, not from the lab: these are the concepts I had to learn to build Kou, Kouzee's assistant, and the ones that helped me most when explaining them to people who design spaces and have no interest in becoming prompt engineers.
Why bother, if everything changes every week
Because the technology changes and the foundations stay. New models are built on the same principles laid out below, the way BIM was built on the logic of drawings without replacing the architect. In every leap the profession has taken —from the drafting table to CAD, from CAD to BIM— what mattered was never the tool, but how it was used.
And there's a more practical reason: vocabulary. When we all know what a plan, a section and an elevation are, asking for changes is easy. Same with AI. Knowing what a seed, a diffusion model or a ControlNet is lets you ask for what you want instead of describing “the thingy that does the thing”, like at the hardware store.
What kinds of models generate images
GANs: a painter and a judge
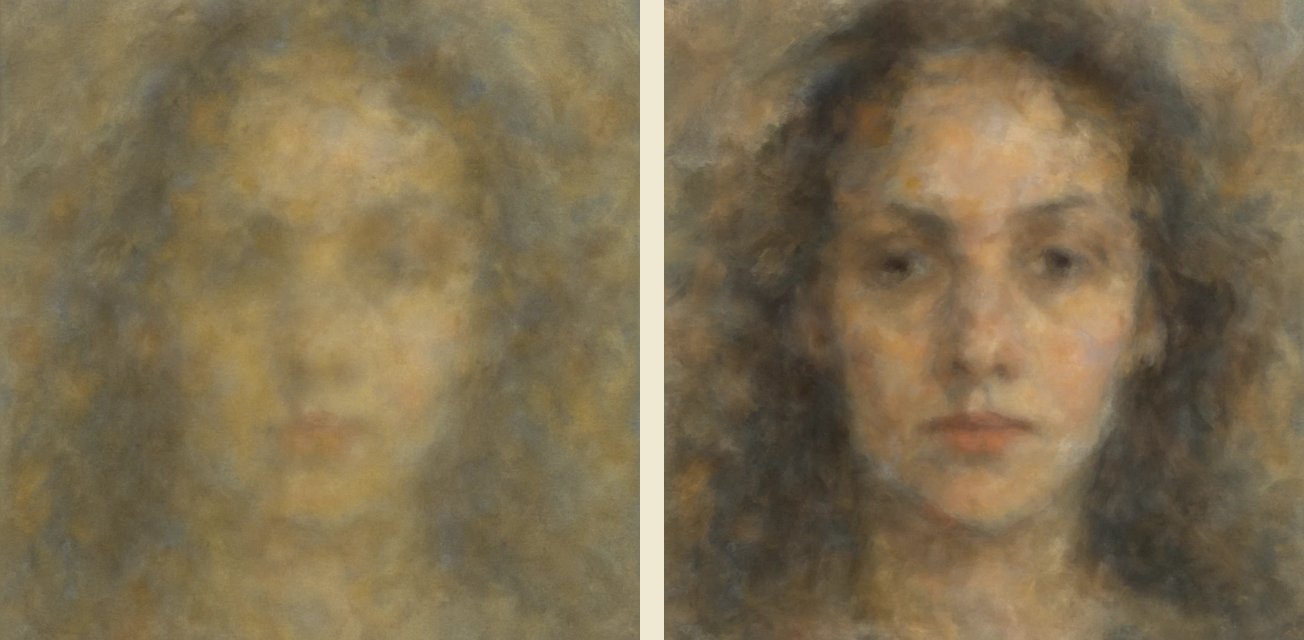
GANs (2014) were the first models to invent new, coherent images. They work with two competing networks: one “paints” from random noise and the other critiques —“that image is fake”— until the first one manages to fool it. That's how the first generated faces were born, small and blurry at first, hyperrealistic later with models like StyleGAN. The original paper by Goodfellow and his team is the starting point for everything that came after.
Transformers: building with LEGO
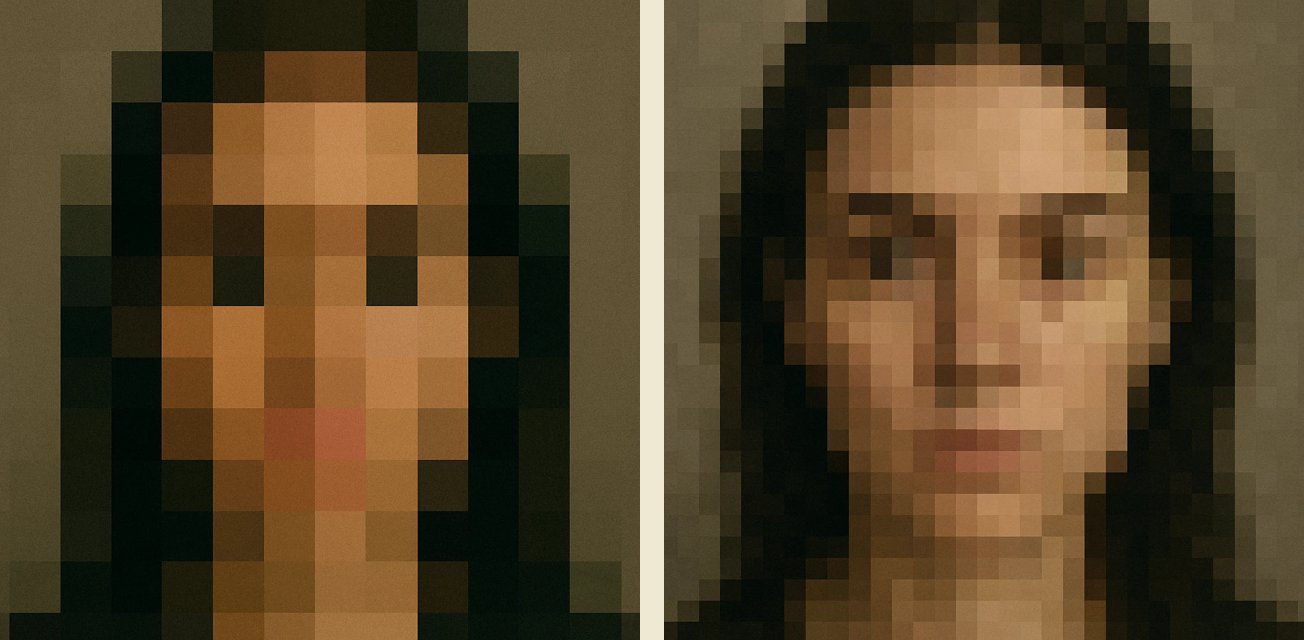
They use the same architecture as text models like GPT or Claude, applied to images: they split the image into patches (visual tokens) and build it piece by piece, predicting the next patch like a puzzle. For years they were less common than diffusion for still images, but they dominate video and the multimodal models that today generate image and text from the same place.
Diffusion: tuning the TV
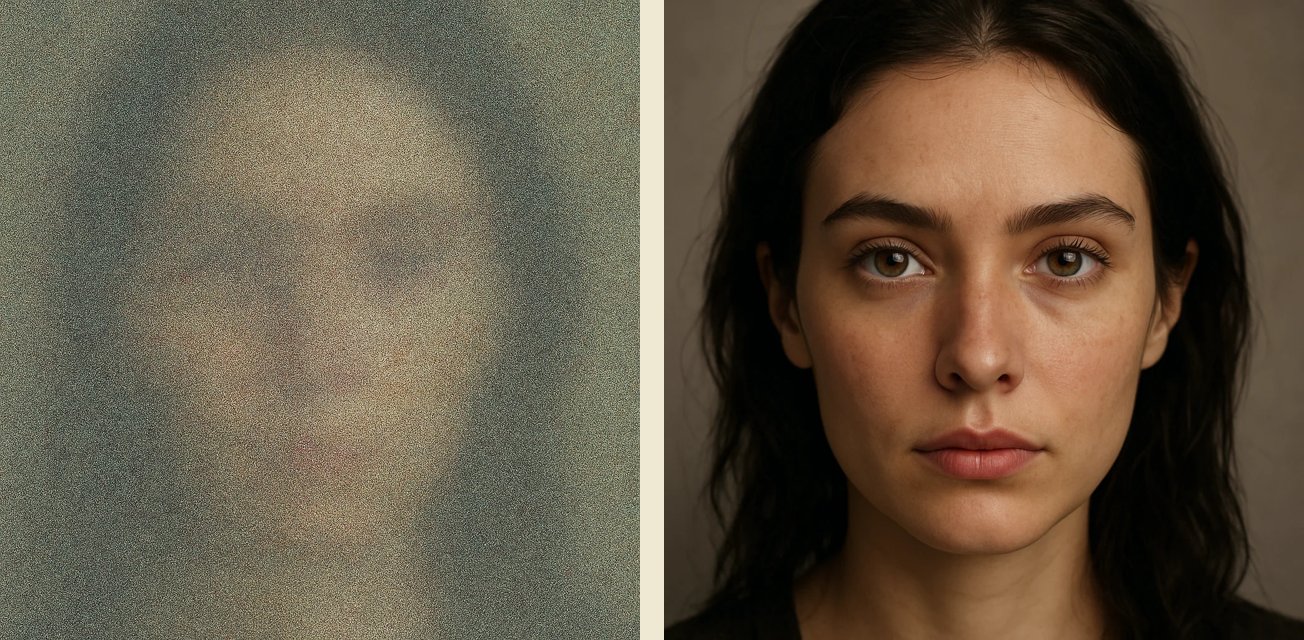
Diffusion models —Stable Diffusion, Midjourney, DALL·E, Flux— are the most used today. They're trained backwards: take real photos and add noise until they're destroyed, then learn the reverse process. When generating, they start from pure noise and “clean” it step by step until the image appears, like moving the antenna until the channel tunes in. The idea comes from the 2020 DDPM paper; the massive leap came when Stable Diffusion ran it in latent space, far cheaper, and released it as open source. That explains the creative explosion since 2022.
Controllers: the coloring book
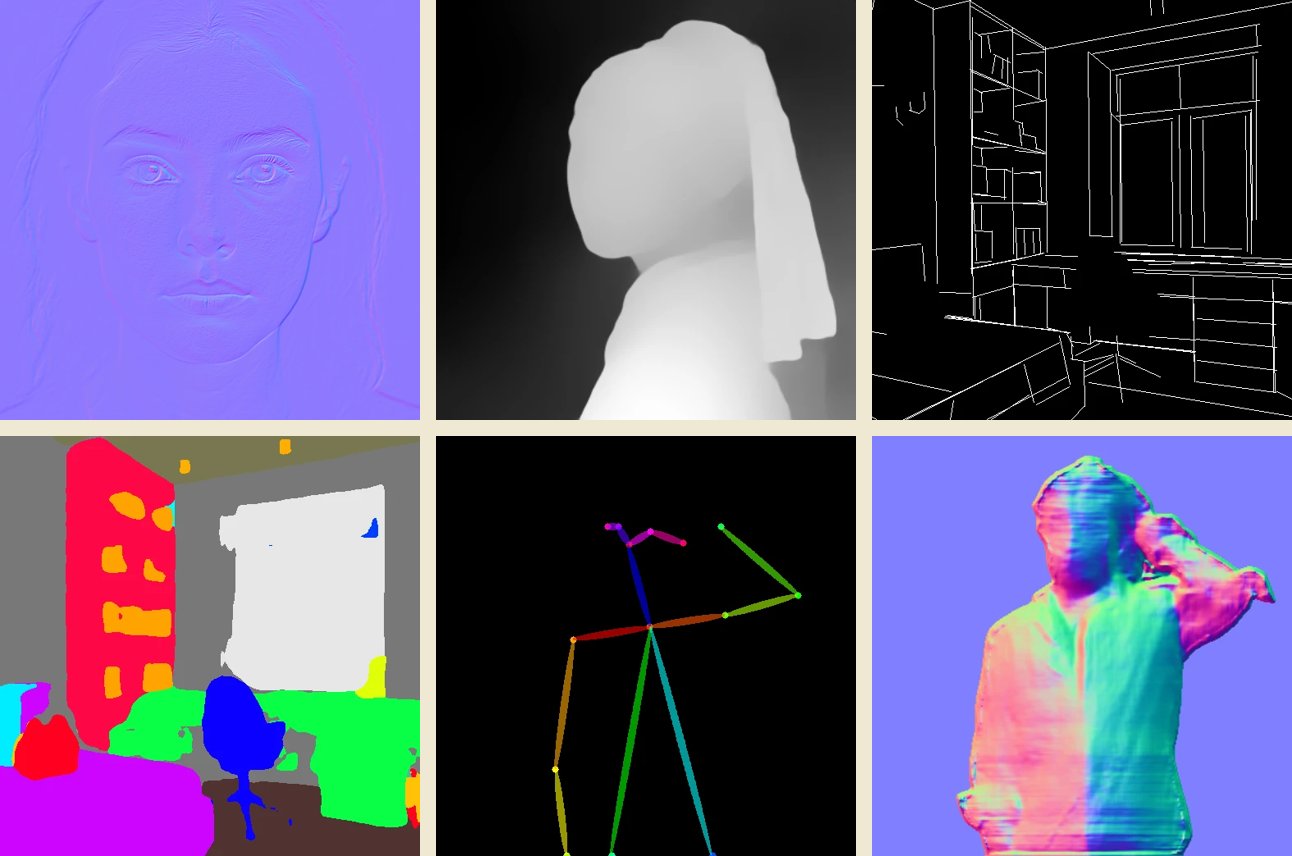
ControlNet and LoRA don't generate on their own: they guide the big models so they stay inside the lines, like a coloring book. They're the reason an AI can respect your project instead of inventing another one. The control maps I use most in interior design:
- Depth: what's in front and what's behind, key for light and shadows to fall correctly.
- Contours and edges: preserve geometry and scale; nothing warps.
- Human pose: a reference skeleton to generate people in the exact posture.
- Segmentation: isolates areas so you can change one material without touching the rest.
- Normals: simulate how light hits depending on whether a surface is rough, smooth or glossy.
- Perspective lines (MLSD): the most important one for interior architecture. Keeps the layout and the perspective of the space.
LoRAs, on the other hand, are trained to become experts on one specific object —your chair, your bottle, your lamp— and make sure that product comes out faithful while the general model resolves the scene. For the technical detail: the ControlNet paper (2023) and the LoRA paper (2021), which was born for text models and ended up being used everywhere.
Seed, CFG and steps: the three parameters behind the weird results
Seed: asking for Pedro
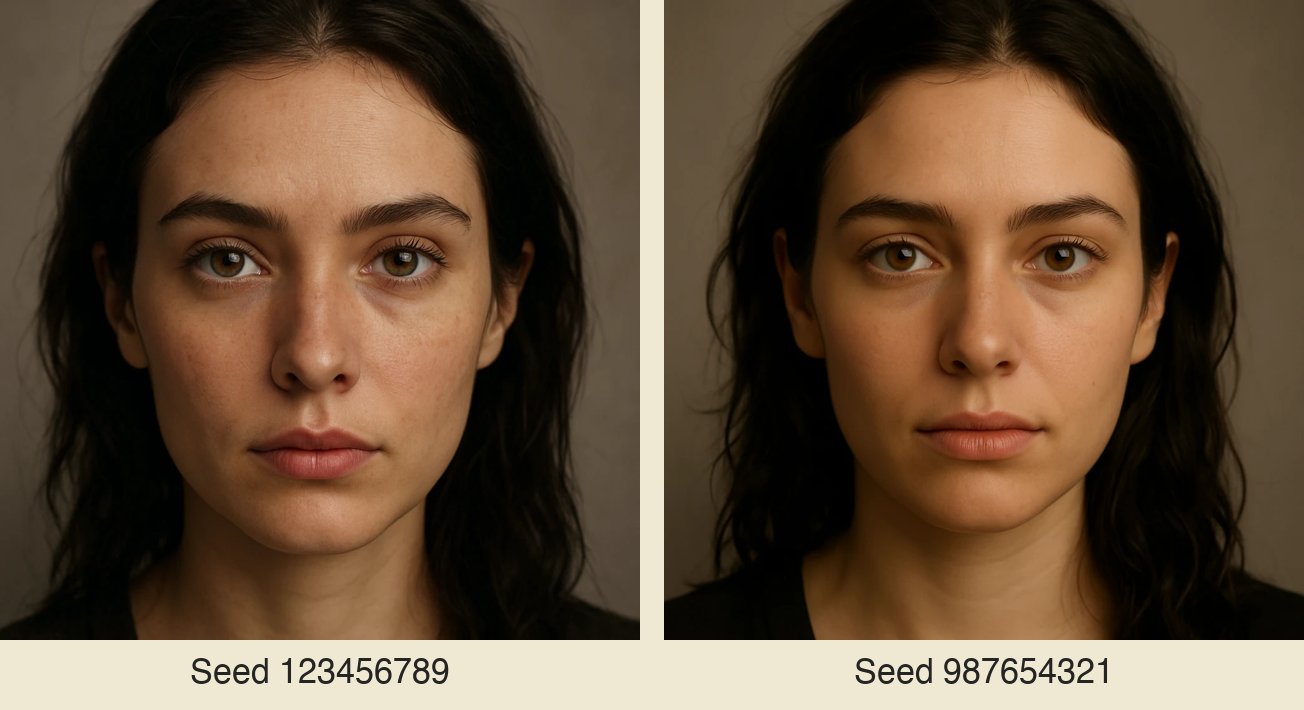
The seed is the number that sets the starting point of the noise. Same prompt + same seed = the same image; change the seed and “brown-haired woman, 50 mm portrait” still matches the description, but it's another person. If you ever asked for “the same Nordic house but in another landscape” and got a completely different house, this was it: nobody controlled the seed. It's like going back to an office and asking whether Pedro is in, because Pedro already knows how to help you.
CFG: the GPS of creativity
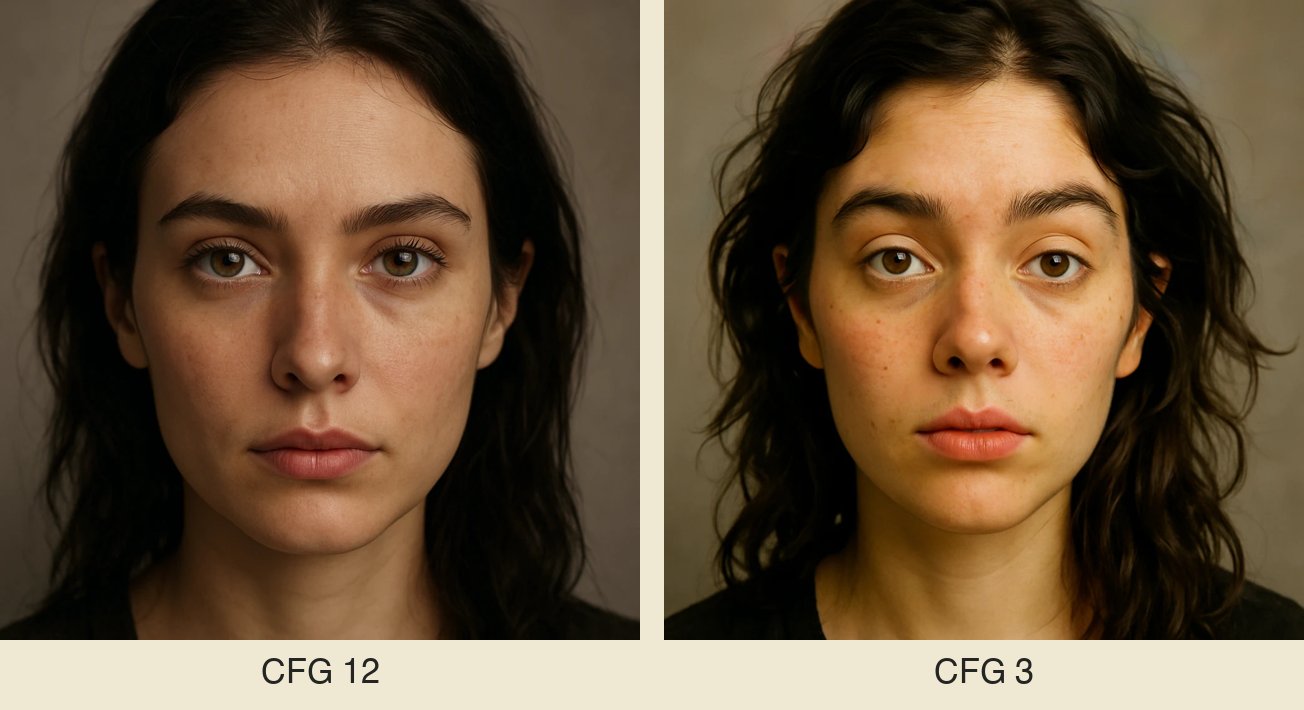
It controls how literal the AI is with your prompt. Low: more creative freedom. High: total obedience, with the “wish-granting genie” risk: you ask for “a painting over the table” and it puts it literally on top of the table instead of hanging it on the wall. The AI's common sense lives in this parameter. The technique is called classifier-free guidance and it's as simple as it is elegant: the model generates with and without your prompt and exaggerates the difference.
Steps: coats of paint
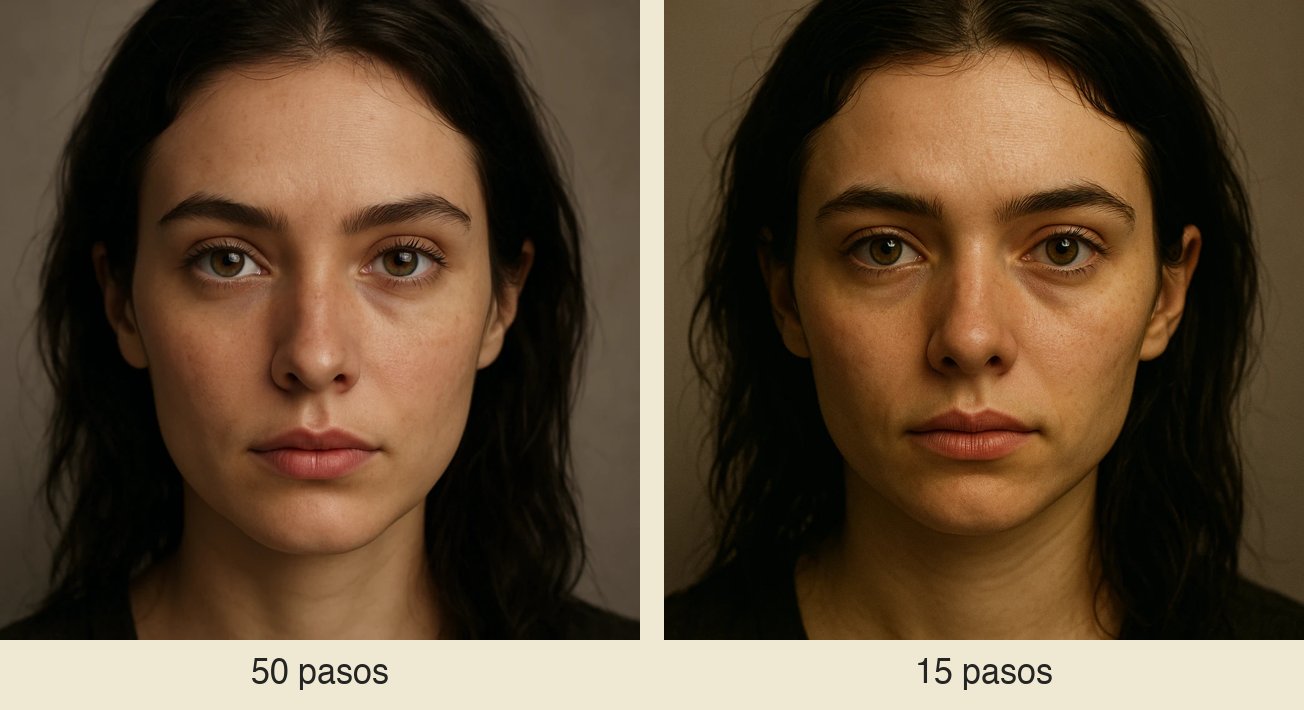
How many iterations the model runs to refine the image from noise. Few steps: fast but blurry —the poorly defined ear, the missing fingernail—. Many: more detail, more waiting. Like applying several coats of paint. The newest models need far fewer steps than the 2023 ones, but the logic is the same.
The methods you'll use every day
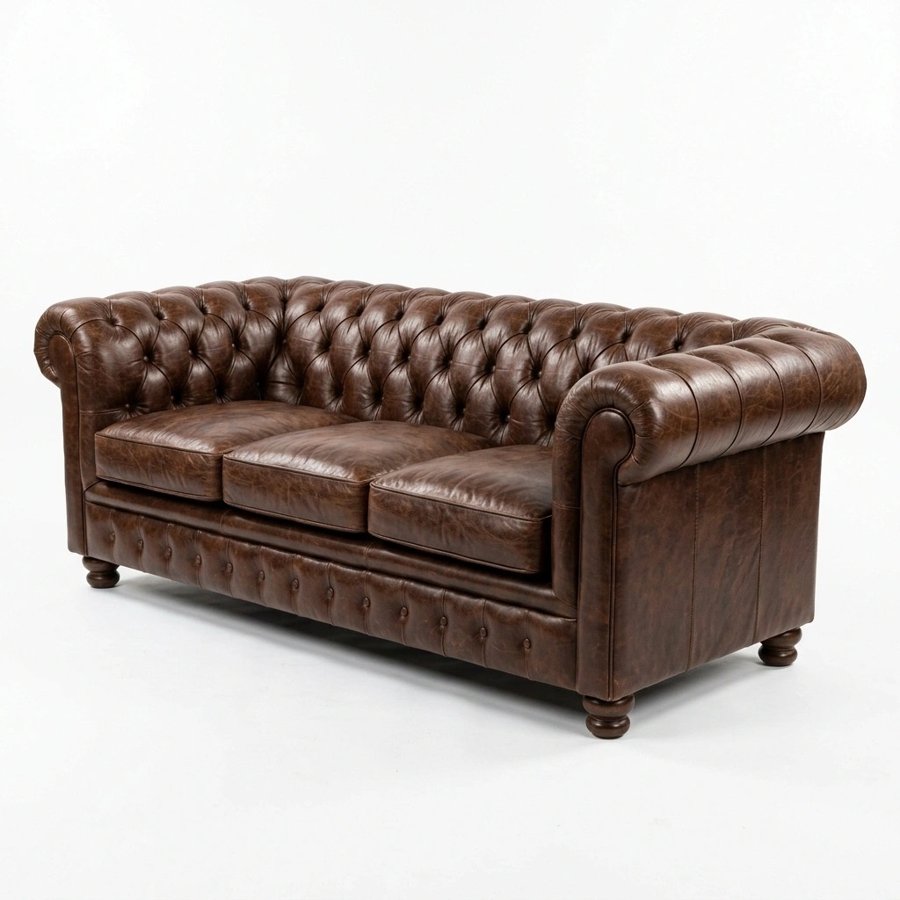
- Text-to-image: you write, the AI generates. “Make a brown leather tufted sofa on a white background” produces exactly that.
- Image-to-image: you upload an image and ask to modify it. It's the central method of the design workflow.
- Inpainting / outpainting: with a mask you modify only a small piece (change the curtain without a sofa appearing out of nowhere) or extend the image beyond its edges.
- Reference images and style transfer: “I want my render in this style” —watercolor, sketch, a painting—.
- Multimodal: the newest models understand text and image natively, without translating between tools. They feel more like a collaborator than an isolated tool.
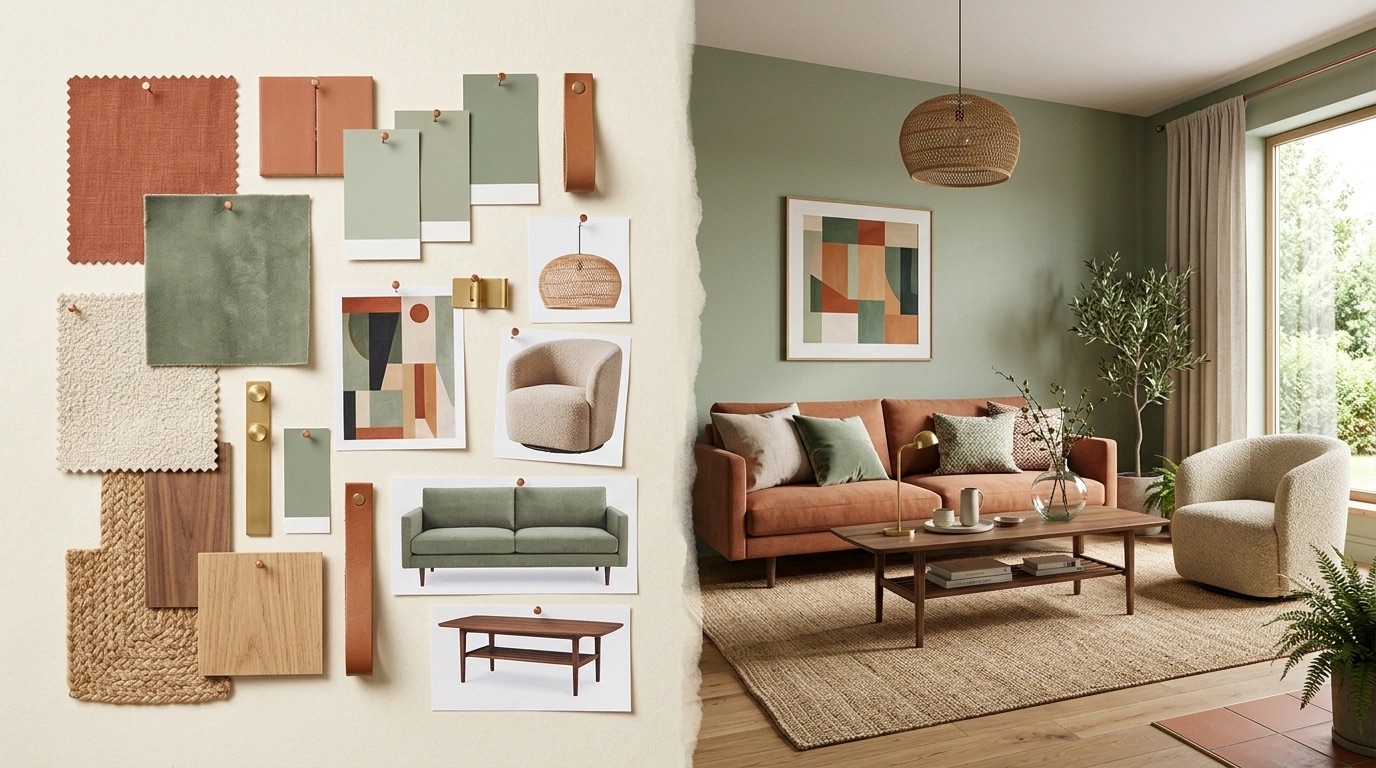
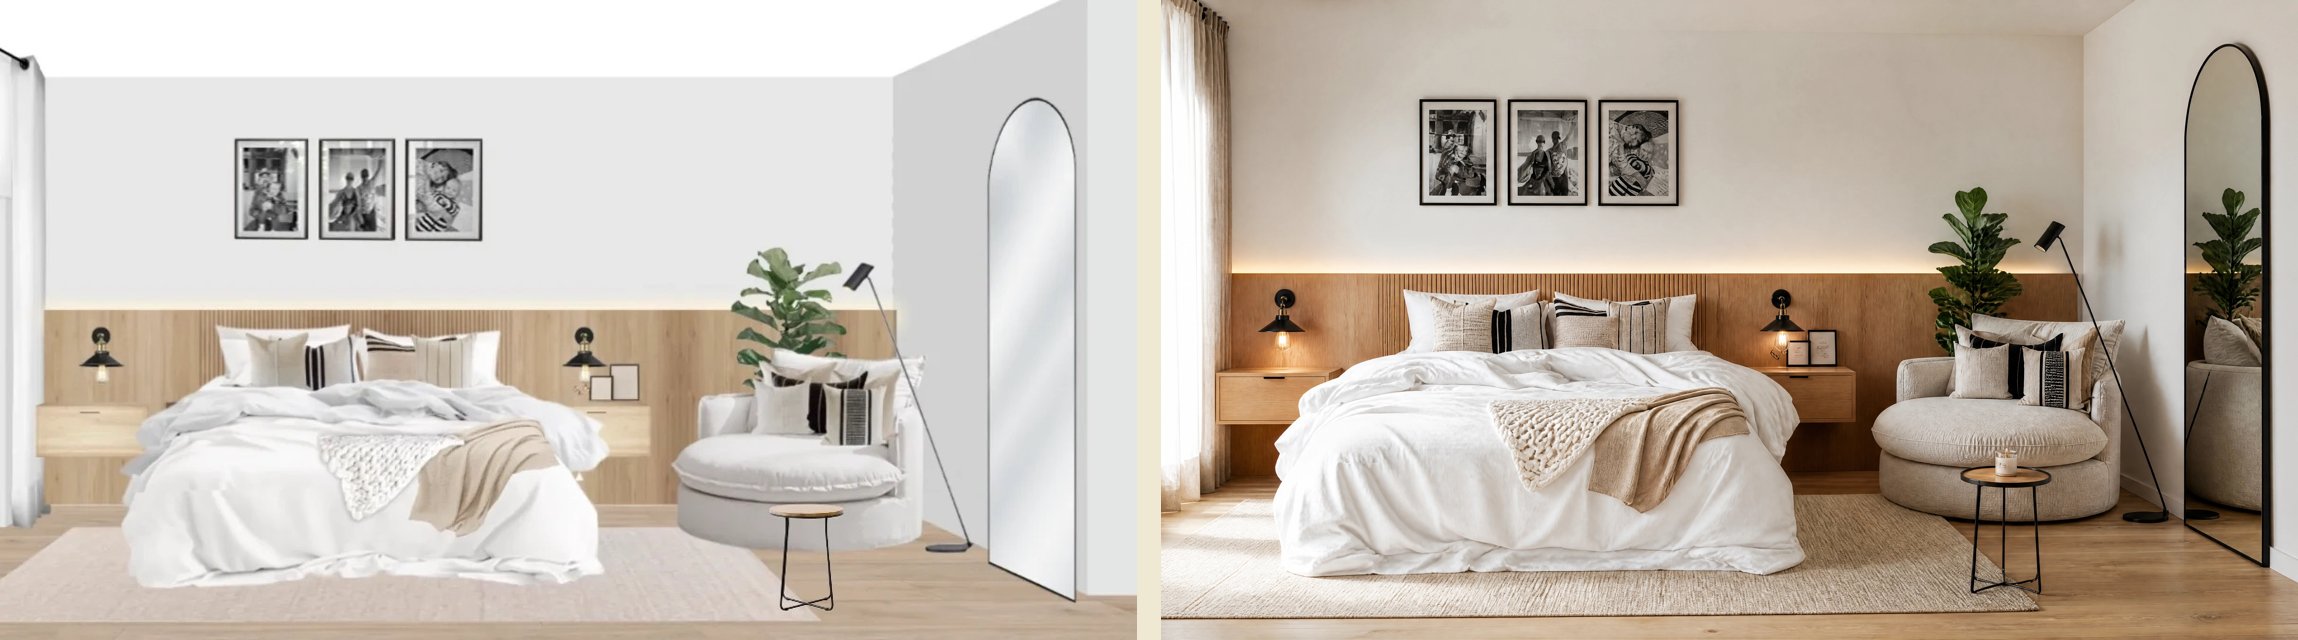
The quality leap in interior design comes from combining these methods with the controllers. A real example from the talk: a 2D photomontage made with catalog products becomes a photograph with depth, lights and shadows, without losing a single product or a centimeter of geometry:
Why a general-purpose chat swaps your products
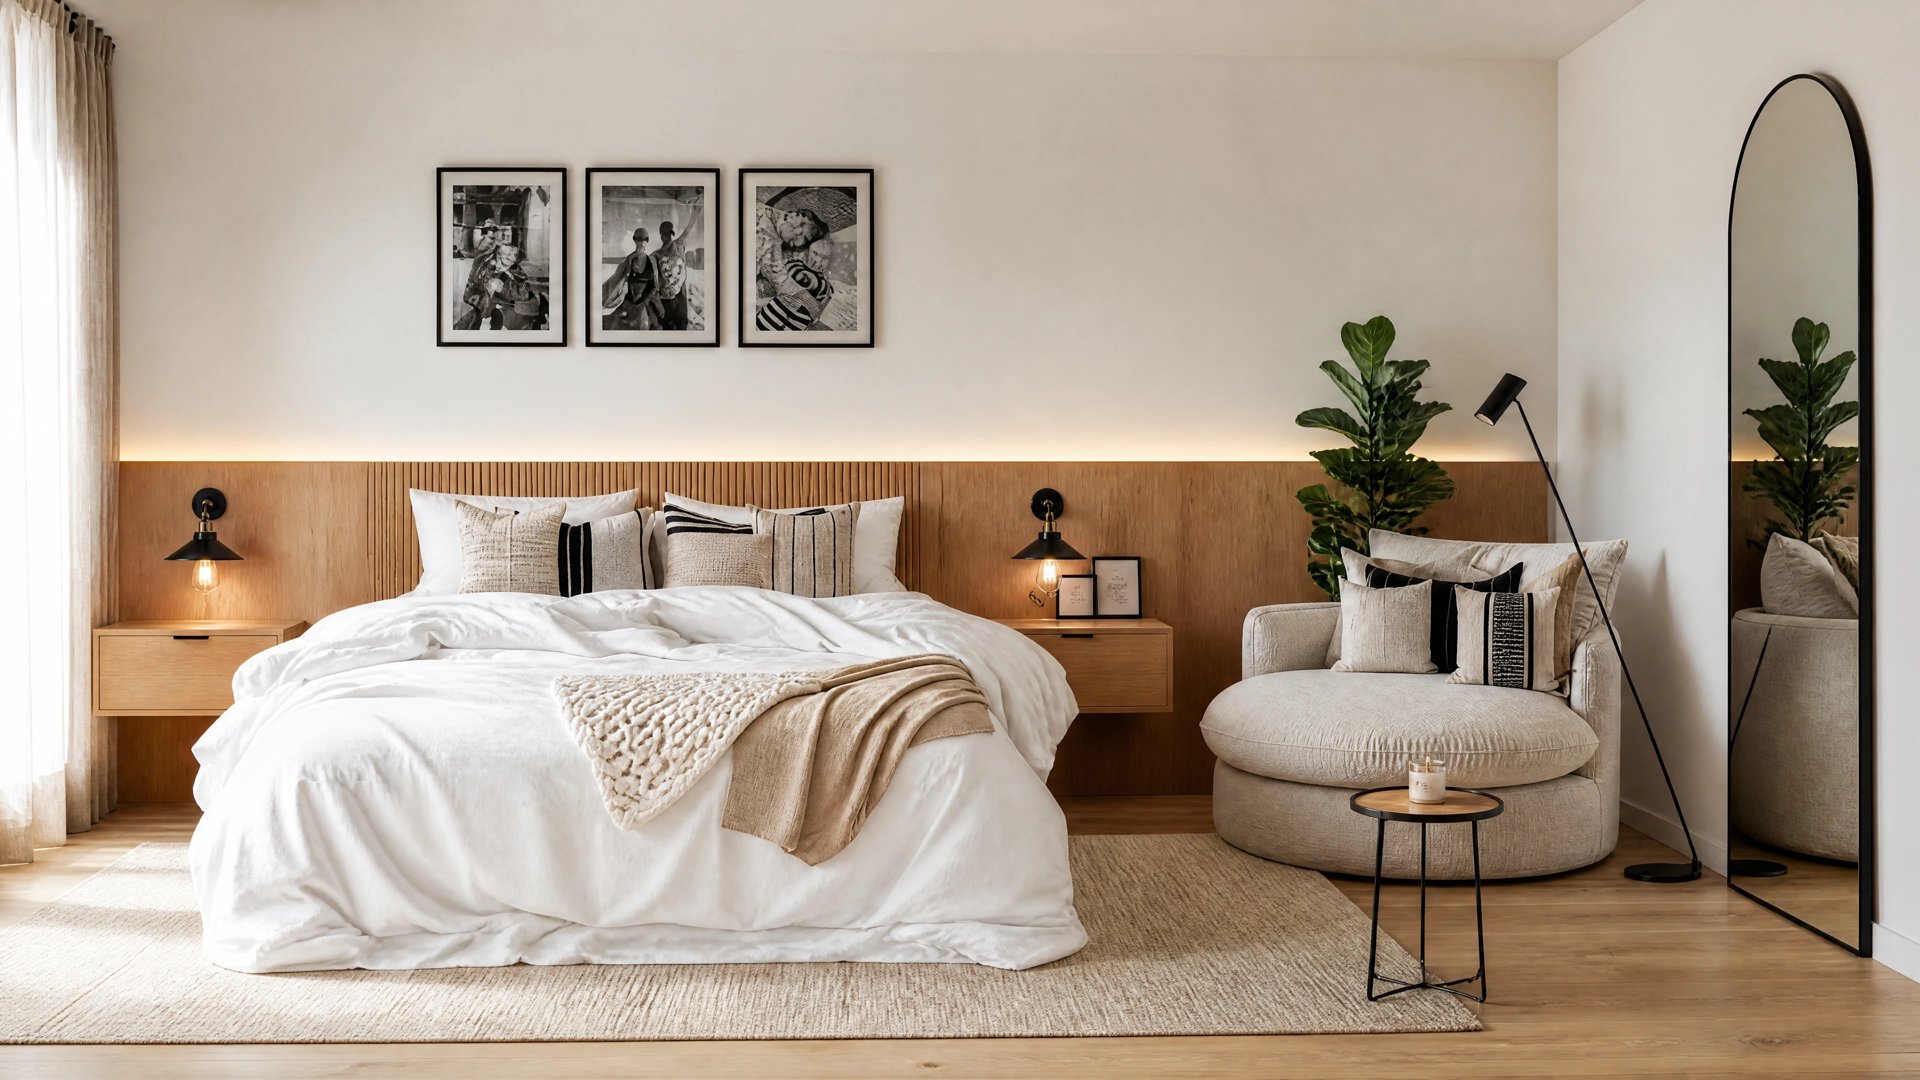
Because it generates a completely new image, pixel by pixel, interpreting the previous one. We ran the test during the talk: the same photomontage processed by a general-purpose chat came back with a different lamp, a floating nightstand turned into a floor cabinet and a different mirror. For a designer that's fatal: if you already sent the client the purchase link, the image no longer matches the product.
A specialized pipeline —model + segmentation + depth + perspective— preserves every piece, because there are controllers dedicated to keeping everything inside the limits. That was the problem that took me the longest at Kouzee, and I tell it in more detail in what I learned building Kou: every button ships with the right model, controllers and parameters preconfigured for each task, so nobody has to tweak seeds or CFG by hand.
Questions I always get
Do I need a powerful computer?
Not necessarily. Models can be downloaded and run locally, but they demand big graphics cards; that's why almost every service generates on external servers and you only send the request. For typical professional use, any computer with a browser is enough.
Why does the AI “invent” things I didn't ask for?
It's almost always a combination of CFG (how literal it is), a missing mask (it changed more than you wanted) or an uncontrolled seed (it changed the starting point). Agents also interpret literally: if you put a floating bench in the photomontage, you'll get a floating bench.
Which model should I use?
It depends on the task, not on the trend: diffusion for images from text or reference, controllers when geometry matters, multimodal for conversational workflows. The healthy strategy is to try, compare, and use tools that already ship with the right settings for your case.
Where to start
Take a photo or a render of your last project and try three things: change a material with a mask, remove an object, and ask for a variation while controlling the reference. With those three exercises you'll understand more than with hours of tutorials.
Ideas and learnings, once a month.